
Are you ready to detach from Google? This comprehensive guide provides a step-by-step approach to removing your Google account from your phone. Whether you’re concerned about data privacy, seeking a digital detox, or simply exploring alternative ecosystems, understanding how to disconnect your Google account is a crucial first step. This process can seem daunting, but we’ll break it down, making it easy to manage your Google data and control your digital footprint on your device. We’ll cover everything from backing up your important data to navigating the specific settings on both Android and iOS devices. By the end of this guide, you’ll be empowered to take control of your digital presence and detach from Google on your phone with confidence.
Detaching from Google doesn’t necessarily mean abandoning all Google services. This guide focuses specifically on removing your Google account from your phone, allowing you to selectively choose which Google services you wish to continue using while minimizing the data collection associated with having your account directly linked to your device. Learn how to disconnect your Google account without losing access to essential applications and services. We’ll explore the implications of removing your Google account, including the impact on your Google apps, data synchronization, and overall phone functionality. Whether you’re looking for increased privacy, a more streamlined mobile experience, or simply want to better understand how to manage your Google data, this guide provides the clarity and instructions you need to confidently detach from Google on your phone.
Before You Begin: Backing Up Your Data
Before removing your Google account, it’s crucial to back up important data associated with it. This ensures you don’t lose access to essential information once the account is detached from your device.
Consider backing up the following:
- Contacts: Ensure your contacts are synced with a platform other than your Google account, or export them to a file.
- Calendar: Save a copy of your calendar events to prevent scheduling conflicts.
- Emails: If you access emails primarily through a Google app, back up important emails separately.
- Drive Files: Download any crucial files stored in Google Drive to your device or another cloud storage service.
- App Data: Certain apps may store data linked to your Google account. Check individual app settings for backup options.
Taking these steps will help preserve your data and prevent potential data loss when you remove your Google account from your phone.
Accessing Your Device’s Settings
Locating the settings app on your phone is the first step in removing your Google account. The process varies slightly depending on your device’s operating system (OS) and manufacturer’s customizations.
Android Devices
On most Android phones, you can access the settings menu by swiping down from the top of the screen to open the notification shade. Then, look for a gear-shaped icon, typically in the top right corner. Tapping this icon will open the Settings app.
iOS Devices (iPhone/iPad)
For Apple devices, locate the Settings app directly on your home screen. It’s typically represented by a gray icon containing gears.
Navigating to the Accounts Section
Once you’re in your device’s settings, locating the accounts section is the next step. The exact location and naming might vary slightly depending on your phone’s manufacturer and Android version. However, the process is generally similar.
Typically, you’ll find a section labeled “Accounts,” “Users & Accounts,” or something similar. Look for keywords relating to user profiles and connected services. Sometimes, this section might be nested within a broader category like “System” or “General Management.”
For example, on some devices, the path might be: Settings > Accounts. On others, it could be: Settings > System > Accounts. If you are having trouble finding the correct section, using your device’s search function within the settings app can be helpful. Simply search for “Accounts” or “Google” and the relevant section should appear in the results.
Selecting Your Google Account
Once you’ve located the Accounts section, you’ll see a list of accounts associated with your device. This list may include email accounts, social media accounts, and, importantly, your Google account. Look carefully for the entry specifically labeled with Google and your associated email address. This is the account you will need to select to proceed with the removal process.
Depending on your phone’s operating system and version, the visual representation of the accounts may vary slightly. Some devices may display profile pictures, while others may simply list the account names. Regardless of the visual presentation, carefully identify the correct Google account. If you have multiple Google accounts linked to your phone, ensure you are selecting the one you intend to remove. Selecting the wrong account could lead to unintended data loss or disruption of services.
After confirming the correct account, tap on it to access the account-specific settings. This will lead you to the next step in the removal process.
Choosing the Remove Account Option
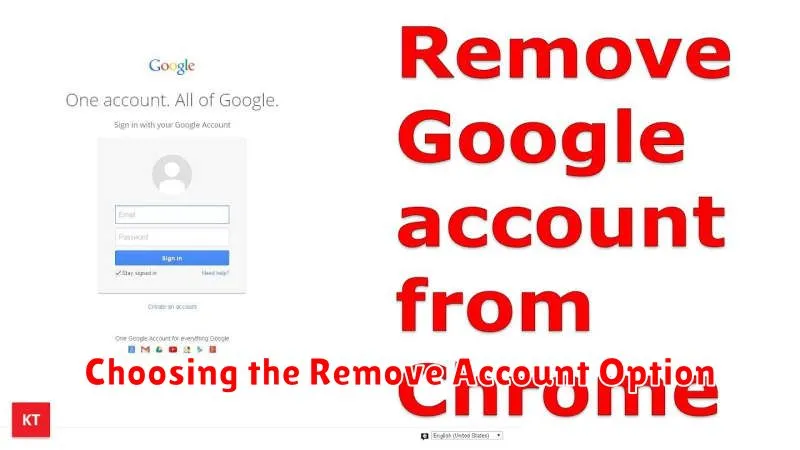
Once you’ve selected your Google account, you’ll be presented with various account management options. Locate and select the option to remove the account. The wording may vary slightly depending on your device’s operating system (e.g., “Remove Account,” “Delete Account,” “Sign Out”).
A confirmation prompt will likely appear, warning you about the implications of removing the account. This prompt usually explains that data associated with the account will be removed from the device. Carefully review this information before proceeding.
If you are certain about removing the account, confirm your selection. The process of removing the account will begin, and your Google account will be disassociated from your phone.
Confirming the Account Removal
After initiating the removal process, it’s crucial to confirm the account is no longer associated with your device. There are a few key indicators to look for.
First, check your phone’s settings. Navigate to the “Accounts” section. The removed Google account should no longer appear in the list of connected accounts. This visually confirms the account’s detachment.
Secondly, try accessing Google apps like Gmail, YouTube, or Google Drive. You should be prompted to sign in. This indicates the account is no longer providing automatic authentication on your device.
Finally, examine your device’s syncing behavior. Syncing of contacts, calendar events, and other Google services associated with the removed account should have ceased. This signifies a successful removal of the account’s integration with your device.
Troubleshooting Potential Issues
Removing a Google account from your phone is usually straightforward, but occasionally issues can arise. This section addresses some common problems and their solutions.
Device Sync Errors
If you encounter sync errors after removing your account, ensure all applications dependent on Google services are closed. Restarting your device can also resolve lingering sync issues. Check your device’s internet connection as a poor connection can interrupt the removal process.
Account Not Listed
If the account you wish to remove isn’t listed in your device’s accounts settings, verify that you’re logged into the correct Google account on your device. You might be logged in with a different account profile.
Removal Process Freezes
Should the removal process freeze, be patient. It might take several minutes to complete, especially if you have a large amount of data synced with your Google account. If the freeze persists, restarting your device may be necessary.
Error Messages
If you receive specific error messages, take note of the message. Searching online for the specific error message can often yield targeted solutions.
Understanding the Implications of Account Removal
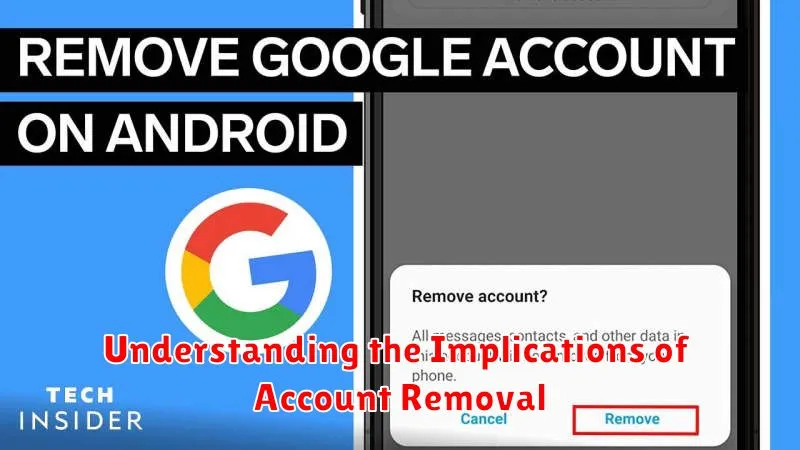
Removing your Google account from your phone has significant implications for the accessibility and functionality of various apps and services. Data synchronization will cease, meaning contacts, calendar events, and other data backed up to your Google account will no longer sync with your device.
Access to Google apps like Gmail, YouTube, and Google Drive will be restricted. You’ll need to add an account back to access these services. App data associated with the removed account might be deleted, depending on the app. This can include game progress, app settings, and downloaded content.
Device-level backups linked to the Google account will no longer be available. Ensure you have alternative backup solutions in place if you remove your account. While some apps may function independently, features relying on Google services like location data or in-app purchases might become unavailable.
Adding a Different Google Account
After removing a Google account, you might want to add a different one to access Google services. This process is straightforward and allows you to utilize apps like Gmail, YouTube, and Google Drive with a separate account.
Navigate to your device’s settings. The exact location may vary slightly depending on the phone’s operating system (e.g., Android version, manufacturer customization). Typically, look for a section named “Accounts” or “Users & Accounts.” Within this section, you should find an option to “Add account.”
Select “Google” from the list of available account types. You’ll then be prompted to enter the email address associated with the Google account you wish to add. Follow the on-screen instructions, which will involve entering the account’s password and possibly verifying the login through two-factor authentication if enabled.
Once the login is successful, the new Google account will be added to your phone. You can then manage the account’s synchronization settings, choosing which data (contacts, calendar, etc.) to sync with your device.
Factory Resetting Your Device
A factory reset removes all data from your phone, reverting it to its original state as if it just came out of the box. This is a drastic step and should be considered a last resort if other troubleshooting methods fail or if you wish to completely erase all personal information before selling or giving away your device. Back up any important data before proceeding, as this action is irreversible.
The process for factory resetting varies depending on your device’s manufacturer and operating system. Generally, you can find this option within the Settings menu, often under a category like “System,” “Backup & reset,” or “General Management.” Look for an option labeled “Factory data reset” or similar.
Once initiated, the device will restart and begin the reset process, which can take several minutes. After completion, the phone will restart again and guide you through the initial setup process as if it were new.