
Is your iPhone running slow, experiencing glitches, or just filled with too much clutter? A factory reset can be the perfect solution to breathe new life into your device. This comprehensive guide will walk you through how to reset your iPhone, providing a step-by-step approach for a fresh start. Whether you’re looking to troubleshoot problems, prepare to sell your device, or simply want a clean slate, we’ll cover all the essential details. We’ll explain the different reset options available, highlight the importance of backing up your data, and outline the entire reset process with clear and concise instructions. Learn how to factory reset your iPhone regardless of the model and restore it to its original settings.
Before you begin the iPhone reset process, it’s crucial to understand the implications. A factory reset will erase all data and settings on your iPhone, returning it to the state it was in when you first took it out of the box. This means all your photos, videos, apps, contacts, messages, and personalized settings will be deleted. Therefore, backing up your iPhone is an absolutely essential step before proceeding. This guide will emphasize the importance of backing up and provide various methods to ensure your precious data remains safe. Follow these steps carefully to understand how to reset your iPhone correctly and prevent any unwanted data loss.
Preparing Your iPhone for Reset
Before initiating a reset, there are crucial steps to take to ensure a smooth process and prevent data loss. Backing up your data is paramount. This safeguards your photos, videos, contacts, and other important files. Choose from iCloud backup, which stores your data wirelessly, or a local backup using your computer.
Next, consider your Apple ID and password. You’ll need these credentials after the reset to reactivate your iPhone and restore your backed-up data. If you don’t remember your Apple ID or password, retrieve them before proceeding with the reset.
Sign out of iCloud, iTunes, and the App Store. This step is especially important if you are giving your iPhone to someone else, as it removes your personal information from the device. On iOS 10.3 or later, go to Settings > [your name] > Sign Out. On earlier iOS versions, go to Settings > iCloud > Sign Out.
Finally, ensure your iPhone has sufficient battery life or connect it to a power source during the reset process. A reset can take some time, and an interruption due to low battery can cause problems.
Backing Up Your Data
Before resetting your iPhone, it’s crucial to back up your data to prevent data loss. There are two primary methods for backing up your iPhone: iCloud and your computer (via Finder or iTunes, depending on your operating system).
iCloud Backup
iCloud Backup is a convenient, automatic solution. Ensure you’re connected to Wi-Fi and have enough iCloud storage. Go to Settings > [Your Name] > iCloud > iCloud Backup and toggle iCloud Backup on. Tap Back Up Now to initiate a manual backup.
Computer Backup
Connect your iPhone to your computer. On a Mac with macOS Catalina or later, open Finder. On a Mac with macOS Mojave or earlier, or a PC, open iTunes. Select your iPhone. Choose the option to back up your device. Select Encrypt local backup for a more secure backup including passwords and health data.
After the backup is complete, verify its success before proceeding with the reset.
Types of iPhone Resets
Understanding the different reset options available on your iPhone is crucial for choosing the right approach for your needs. Here are the main types:
1. Soft Reset (Restart)
This is the simplest type of reset and is often the first troubleshooting step. It involves powering your iPhone off and then back on. A soft reset can resolve minor software glitches and doesn’t delete any data.
2. Network Settings Reset
This reset clears all saved Wi-Fi passwords, cellular settings, and VPN configurations. It’s helpful for troubleshooting network connectivity issues. No data is lost, but you’ll need to reconnect to your Wi-Fi networks afterwards.
3. All Settings Reset
This option resets all settings to their factory defaults, including display settings, notification preferences, and privacy settings. While it doesn’t erase your personal data like photos and apps, it does remove saved Wi-Fi passwords and other customized configurations.
4. Erase All Content and Settings
This is a full factory reset. It erases all data and settings on your iPhone, returning it to the state it was in when you first unboxed it. This is the most comprehensive reset option and should be used with caution after backing up your important data.
Factory Resetting Your iPhone via Settings
This method is the most straightforward way to reset your iPhone and can be performed directly on the device. Ensure your iPhone has sufficient battery life or is connected to a power source before proceeding. This process will erase all data and settings on your iPhone.
First, open the Settings app. Locate and select General. Scroll down and tap on Transfer or Reset iPhone.
Next, tap Erase All Content and Settings. You may be prompted to enter your device passcode or Apple ID password for security verification. A warning message will appear detailing what will be erased. If you’re sure, tap Erase iPhone (or similar wording depending on your iOS version). This action initiates the reset process. Your iPhone will restart and display the Apple logo as it erases and resets itself.
Restoring Your iPhone to Factory Settings via iTunes/Finder
This method involves using your computer to reset your iPhone. It’s particularly helpful if your device is unresponsive or you’re experiencing software issues.
Using Finder (macOS Catalina and later):
Connect your iPhone to your Mac. Open Finder and select your iPhone in the sidebar. In the General tab, click “Restore iPhone”. Follow the on-screen prompts to complete the restore process. This will erase your iPhone and install the latest version of iOS.
Using iTunes (Windows and older macOS versions):
Connect your iPhone to your computer. Open iTunes. If prompted, trust the computer. Select your iPhone when it appears in iTunes. In the Summary tab, click “Restore iPhone”. Confirm your decision and iTunes will erase your device and install the latest iOS version. Ensure your computer has the latest version of iTunes installed for optimal performance.
This method requires an active internet connection to download the necessary software. Remember, this process is irreversible. Ensure you have a backup before proceeding.
Resetting Network Settings
Resetting your network settings can resolve issues with Wi-Fi, Bluetooth, cellular data, and VPN connections. This process erases all saved network configurations, including Wi-Fi passwords, Bluetooth pairings, and VPN settings. It’s important to note that you will need to re-enter these details after the reset.
To reset your network settings, follow these steps:
- Open the Settings app on your iPhone.
- Tap on General.
- Scroll down and tap on Transfer or Reset iPhone.
- Tap on Reset.
- Select Reset Network Settings.
- Enter your passcode if prompted.
- Confirm your choice by tapping Reset Network Settings again.
Your iPhone will restart, and the network settings will be restored to factory defaults. You can then reconnect to Wi-Fi networks, pair Bluetooth devices, and configure VPN connections as needed.
Resetting All Settings
Resetting all settings returns your iPhone’s personalized settings back to their defaults, without deleting your data like photos, music, and apps. This is useful for troubleshooting issues related to Wi-Fi, Bluetooth, notifications, or other settings. Be aware this will remove saved Wi-Fi passwords, paired Bluetooth devices, and customized display settings.
To reset all settings, follow these steps:
- Open the Settings app.
- Tap General.
- Scroll down and tap Transfer or Reset iPhone.
- Tap Reset.
- Select Reset All Settings.
- You’ll be prompted to enter your passcode (if set) to confirm.
Your iPhone will restart to complete the process. After restarting, you’ll need to reconfigure your personalized settings like Wi-Fi and Bluetooth.
How to Reset iPhone without Apple ID Password
Resetting your iPhone without your Apple ID password can be challenging due to Activation Lock, a security feature designed to prevent unauthorized use if your device is lost or stolen. If you don’t know your Apple ID password, you generally have a few options:
1. Apple ID Password Recovery
Try recovering your Apple ID password through Apple’s website. This is the most straightforward method if you have access to the recovery email or phone number associated with your account.
2. Contact Apple Support
If password recovery is unsuccessful, contacting Apple Support directly is your next step. They may be able to assist you with account verification and password reset options. Be prepared to provide proof of purchase and other identifying information.
3. Third-Party Software (Use with Caution)
Some third-party software claims to bypass Activation Lock. Exercise extreme caution when using such tools. They may not be reliable, could damage your device, or even compromise your data. This option should be considered a last resort.
It’s crucial to remember that bypassing Activation Lock without proper authorization could be illegal in your region. Always try legitimate channels like Apple’s official support first.
Troubleshooting Reset Issues
Occasionally, you might encounter problems during the reset process. Here are some common issues and potential solutions:
iPhone Not Responding During Reset
If your iPhone freezes or becomes unresponsive during a reset, try a forced restart. Press and quickly release the volume up button, then press and quickly release the volume down button. Finally, press and hold the side button until the Apple logo appears. If the issue persists, connect your iPhone to a computer with iTunes (or Finder on newer macOS versions) and attempt a restore through the software.
Reset Takes Too Long
A reset can take anywhere from a few minutes to over an hour, depending on the amount of data on your device. If the process seems unusually long, ensure your iPhone has sufficient battery power or is connected to a power source. If the progress bar hasn’t moved for an extended period, consider contacting Apple Support.
Errors After Reset
If you encounter error messages after the reset, such as activation errors, check your internet connection. A stable Wi-Fi or cellular connection is essential. If the problem continues, try repeating the reset process or connect your iPhone to a computer with iTunes (or Finder) for further assistance.
Restoring Your Data after the Reset
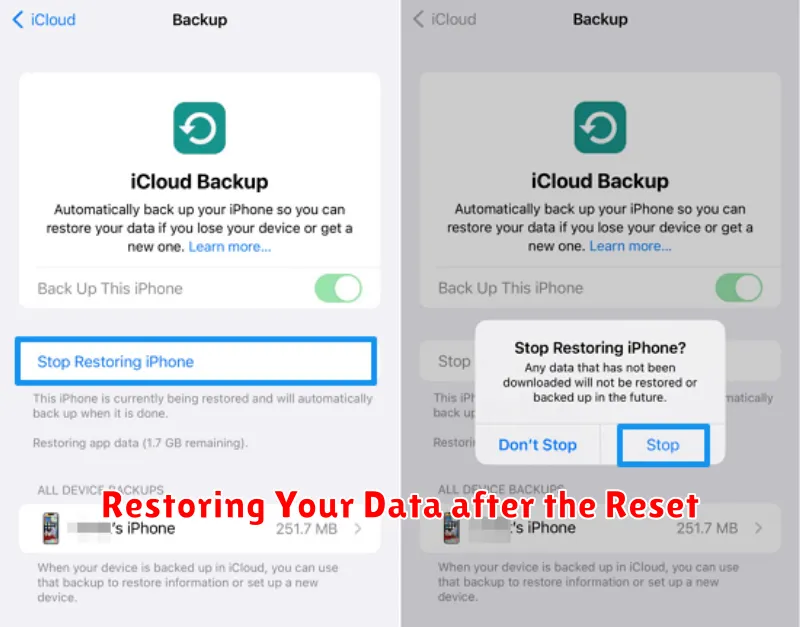
After resetting your iPhone, you’ll have a clean slate. This section details how to restore your data using backups, ensuring a smooth transition back to your familiar iPhone setup. Choosing the right restoration method depends on your backup preferences.
Restoring from iCloud Backup
If you’ve enabled iCloud Backup, your data is safely stored in the cloud. After the reset, during setup, choose the option to restore from your iCloud backup. Ensure you’re connected to a stable Wi-Fi network as this process can take time depending on the backup size.
Restoring from a Computer Backup
If you regularly back up your iPhone to a computer using Finder (macOS Catalina or later) or iTunes (earlier macOS versions or Windows), you can restore from this backup. Connect your iPhone to the computer, open Finder or iTunes, and select the restore option. This method is generally faster than restoring from iCloud, especially for large backups.
Starting Fresh
If you prefer a completely fresh start, you can skip the restoration process altogether. This means you’ll need to manually reinstall apps and reconfigure settings. This option is recommended if you’re trying to resolve persistent software issues.